Roblox’s Deepwoken RPG doesn’t hold your hand and is scarce with explanations, so I’m going to run you through the first few hours. I’ll teach you some basics about leveling, farming resources, talents, and other mechanics so that you can get a great start. Here’s my ultimate Deepwoken beginner’s guide.
Ultimate Beginner’s Guide for Deepwoken
We’ll start from the basics, like creating your character, and then move on to leveling. This is also where we’ll talk about the main mechanics, like Talents and combat tips. Once the basics are done, I’ll show you where to farm notes and gear in a much safer and more productive way than just going to Lower Erisia.
Character Creation Guide in Deepwoken
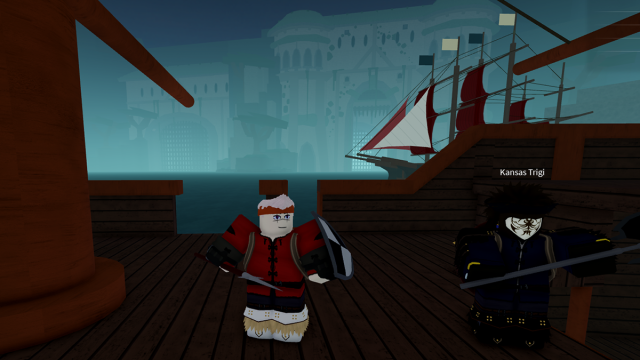
There are a few important tips during character creation that you should have in mind. Here are the basics:
- Race: For the best races to roll for, check out our Deepwoken race tier list.
- Weapon: I recommend starting with the Sword to learn the combat system, which we’ll talk about below, and avoiding the Stiletto.
- Stats: I highly recommend you get 5 Strength and 5 Willpower for the Carnivore Talent for minimizing Hunger/Thirst, which we’ll talk about later. Otherwise, the starting racial stat boosts aren’t that important at the beginning since we’ll level them up easily ourselves.
- Mantra (Element): These are your magic skills called Mantras, and all the elements are good in Deepwoken, so pick your favorites.
- Boons & Flaws: It’s important to pick Boons that come up often or don’t in the case of Flaws. Great boons are Steadfast, Pack Mule, Survivalist, and Scrapper while good flaws to take are Hemophilia, Manic, and Simple.
- Tutorial: Don’t skip the tutorial since it’ll teach you useful information as well as grant you a Mantra talent right away.
From here, I would start with the default Etria origin since I’ll have some tips later on this starting location.
How to Increase Power in Deepwoken
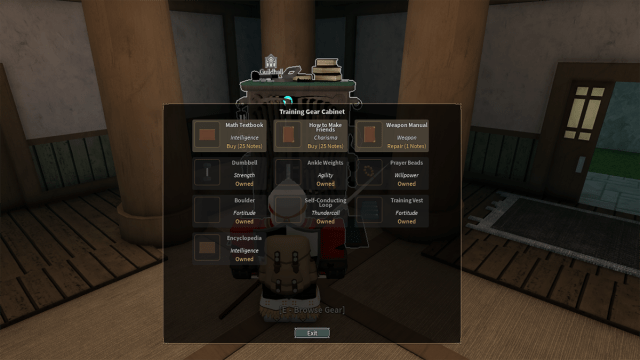
Deepwoken’s levels are called Power levels, and you level up by spending all Investment points. Each Power level has 15 Investment points that you can spend to level up your stats. Note that your first Power level will have less because you’ve already increased some stats during character creation. To spend Investment points, you need to do three things:
- Step 1: Figure out which stat you want to increase based on what equipment/Talents you want. For example, you need Strength for heavy weapons, Fortitude for shields, the Light/Medium/Heavy Weapon stat to be able to wield specific weapons, your elemental stat for better Mantras (spells), etc. You also need mental stats for certain talents.
- Step 2: You can earn both General XP from killing enemies and exploring as well as XP from stat-specific activities related to your stat. For example, the L/M/H weapon stat XP is earned by using a specific weapon, Strength by chopping wood, Fortitude by taking damage, the elemental stat by casting Mantras, mental stats by exploration, etc.
- Step 3: When you have enough XP to increase a stat, you’ll get a notification that you need a specific piece of equipment to increase it. Now, you need to buy, equip, and use that piece of equipment to increase a stat. Here are the best ones found at the Antiquarian for each stat:
- Strength: Dumbbell
- Agility: Ankle Weights
- Fortitude: Boulder
- Willpower: Prayer Bead
- Intelligence: Encyclopedia
- Charisma: Friend Book
- Mantra: You’ll have one already (For example, it’s the Self-Conducing Loop for Thundercall)
- Weapons: Weapon Book.
To check whether you have enough XP to increase a stat, just use the appropriate item. Your Power increases once you use all points and you get new talents. Your Investment points then reset to 15.
Best Talents in Deepwoken Early
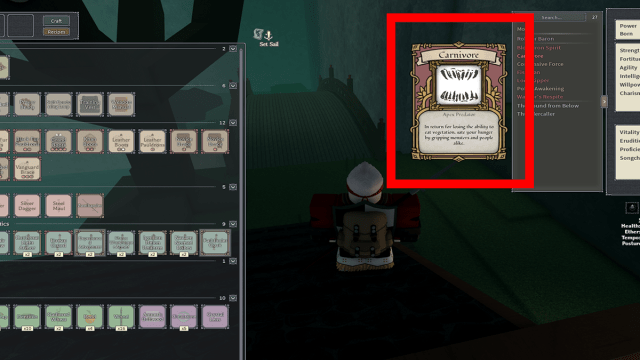
Talents are the main special ability mechanic in the game. They come in the form of cards you can select from a set of different ones each time you increase your Power level. Talents have prerequisites like stats, level, and other Talents, so some won’t show up until you get all the prerequisites. You can usually pick whichever ones sound best to you, but I highly recommend going for these:
- Carnivore (Requires 5 S, 5 W, which we got in Character Creation): You heal when you finish off NPCs, players, and monsters, which keeps you sustained while exploring. Note that you can’t heal from vegetation anymore, and don’t pick the Vegetarian flaw or Herbivore as they delete this talent.
- Warrior’s Respite (Requires 15 F): Heals you when you stand still which is free healing during exploration without a campfire.
- Conditioned Runner (Requires Scaredy Cat and Endurance Runner Talents): More healing during exploration and combat when you sprint.
- Ghost (Requires 40 A, Swift Rebound, Evasive Expert, and Risky Moves Talents): Rolls and dodges make you invisible, which is one of the best Talents in the game.
These are some of the best Talents in the game so always pick them or their prerequisites. You need a total of 40 Agility, 25 Fortitude, 5 Strength, and 5 Willpower to get them all. Don’t take Safety Dance or Observation, as they’ll lock you out of the above talents.
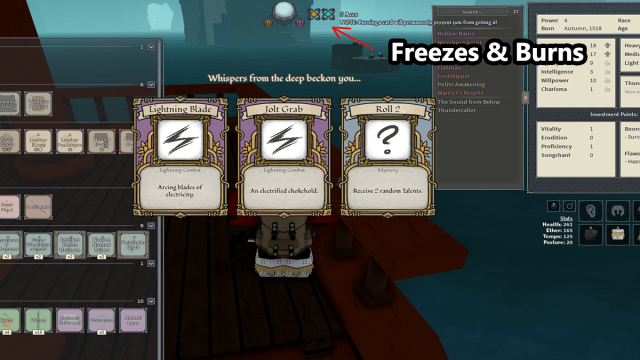
Furthermore, you can guarantee common prerequisite talents via the Mystic for a small Notes fee. Note that you can also Freeze a Talent you like when picking them during a Power-up or Burn the ones you don’t like deleting them forever. Freezes and Burns use Aces to the right of the Power-up talent-picking icon, and you get them back while leveling up.
Best Early Items in Deepwoken (Armor, Glider, and Canteen)
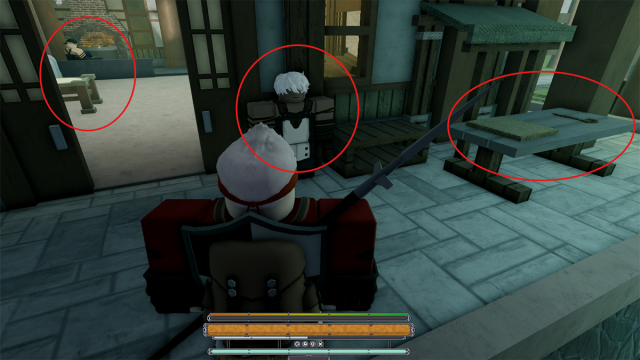
As soon as you spawn in your starting Etria location, there’s an NPC in the starting inn that you can talk to for free Notes. Then, go to the Smith. Check behind the side door for a young apprentice NPC and talk to them. Choose the option not to tell on them, and they’ll give you a discount on materials. From here, do the following:
- Armor: Buy a Cloth from the table and talk to the Smith to create your first armor.
- Free Axe for Wood: Go talk to the white-haired Korin NPC near the Antiquarian and get a free Axe by agreeing to chop wood.
- Glider: Use the Axe on the tree near the Smith to get both Wood and Beeswax which we need later. Then buy 2 Cloth and use the Crafting table at the Smith by placing Wood in the top left menu and clicking Craft for Sticks. Combine 2 Cloth and 2 Sticks in that same crafting menu to get a Glider. You can use this to glide with N.
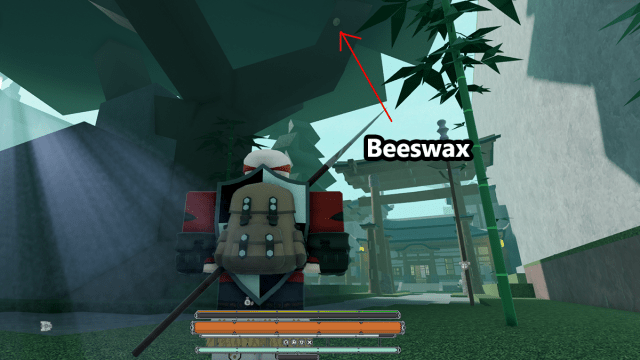
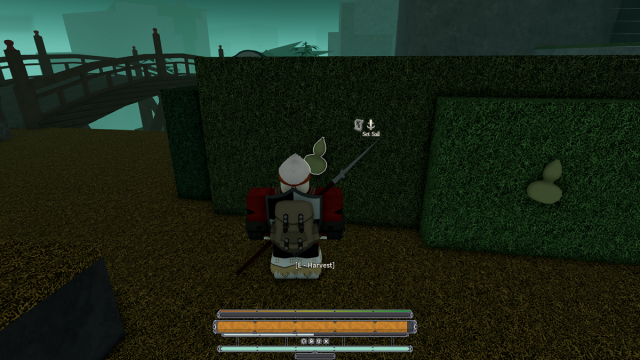
- Canteen: Go into the woods in front of the starting town following the main stone path until you reach a green bush and gather Calabash fruit from it. Combine Calabash and the Beeswax we got earlier for a Canteen that you can store water in to make Thirst easier.
As for advanced weapons and armor, go to the farming guide below.
Crafting and Cooking Guide in Deepwoken – How to Manage Hunger and Thirst
You can easily access the crafting menu by hitting Tab, it’s in the top left. You usually need a Campfire or a Crafting Station to craft items, though. These can be found in towns or you can craft a Campfire with Flint and Wood. You can also check your known recipes here or look them up online.
Starting out, you’ll need to secure some food and water to start off. The Carnivore Talent will take care of this but if you don’t have it, this is best done through crafting. I’ve shown you how to craft a Canteen for storing water above. That said, you can always just drink water from wells in towns and other locations.
As for food, I highly recommend starting with Mushroom Soups, Bread, or Fish. You can find Wheat and Mushrooms everywhere, so always pick them up when you can. At a campfire, you can craft Bread from 3 Wheat or a Mushroom Soup by combining any two different types of mushroom. This restores both Hunger and Thirst. Lastly, you can also craft a Fishing Rod with 1 Fiber and 2 Sticks and catch Fish for food, more on that in our Fishing guide.
Deepwoken Combat Tips
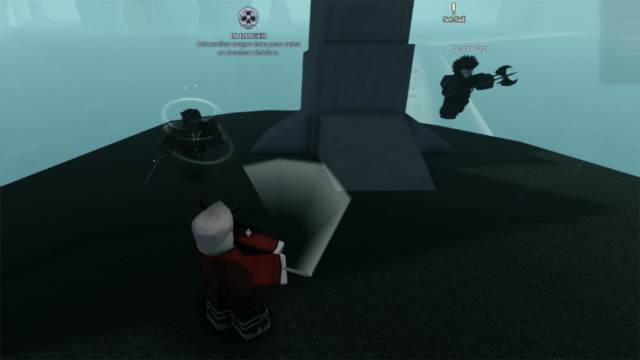
The Deepwoken combat system is all about parrying attacks, dodging well, feints, and attacking at the right time with weapons and Mantras. Here are some combat tips to keep in mind:
- Animation and Roll Canceling: Hitting Feint (M2) cancels your attack so that you can trick your opponent into parrying, and then you can attack past their block. More importantly, there’s also a trick where you can hit Feint immediately after a Roll to cancel the roll animation and attack right away or roll again quickly. You can also cancel Mantras, but note that this will consume Ether.
- Parrying: Hitting F once makes you Parry, but holding it means you block all damage. Practice timing your parries to enemy attacks, and once their combo ends, you can retaliate.
- Rebind Roll: I highly recommend you rebind the Roll from Q to another key of your choice so that you can Roll more reliably. This goes for all keybinds in the Settings menu in the top left.
- Power Up Mantras: You can power up your Mantra stat by using the training gear of your appropriate element, which you get from the start for free. You’ll gain more Mantra damage and even more Mantra ability options at 10, 20, 30, etc.
- Vent: Once the short blue bar at the bottom called Tempo fills up to half, you can hit G to spend it and push all enemies away from you. Great when getting overwhelmed.
- Sliding: While sprinting or jumping from a sprint, you can hit Crouch (Ctrl by default) to slide. If you jump from a slide, you’ll jump further, giving you more mobility options.
- Get Ranged Mantras: All Mantras are great, but I would recommend getting ranged ones first to diversify your arsenal. You get more Mantras and also upgrade them as you increase the corresponding elemental stat that you chose at character creation.
How to Farm Gear and Notes in Deepwoken Early
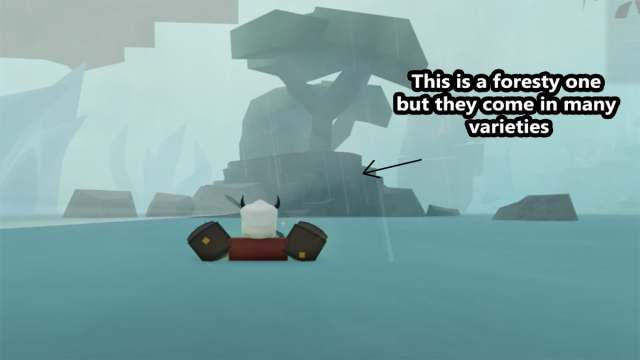
Once you get your basic equipment, it’s time to head out. That said, I don’t recommend going to the Lower Erisia landmass right away since there are a lot of PVP players hunting for beginners there. Instead, we’re going to sail on the outskirts of Lower and Upper Erisia, looking for small islands with loot chests there:
- Step 1: Follow the Sail quest icon on your HUD until you reach a place where you can spawn a free basic boat.
- Step 2: Take your boat towards Lower Erisia, but don’t go to the main island. Instead, sail around the Lower and Upper Erisia main landmasses (Use the Map) and try to spot small island chunks. Look for ones with 2-4 NPC humanoid enemies like bandits or zombies. There are even small stone block islands with smaller loot chests around. If you see larger monsters on these islands or enemies with Mantra abilities I would avoid them for now.
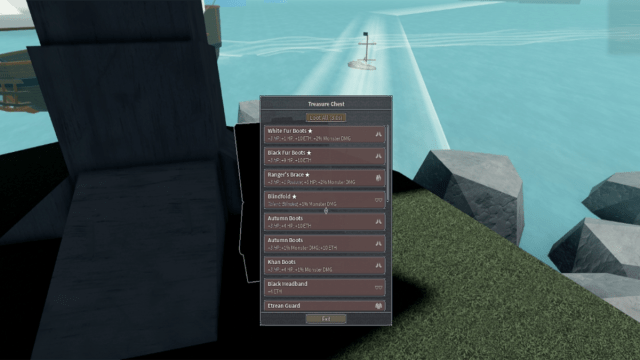
- Step 3: Once you spot a smaller island with bandits, zombies, or similar low-level humanoid enemies, approach, aggro, and bait them near your boat. You can attack them without leaving the boat at all, and they’ll drown once knocked out. If you feel confident, go to the island and defeat any remaining enemies to find a couple of chests full of gear and treasure.
- Step 4: Once you loot one or two of these islands, I would either go back to your starting town and sell the loot you haven’t equipped to the Antiquarian. Alternatively, look for a lone ship with blue-ish sales because this is the wandering merchant where you can also sell gear.
- Step 5 (Optional): Look for a Purple Orb on the seas that you can pick up by swimming to it and getting it back on your boat by going to the back of the boat and hitting Steer. Sell this to the Banker in town for Notes and gear.
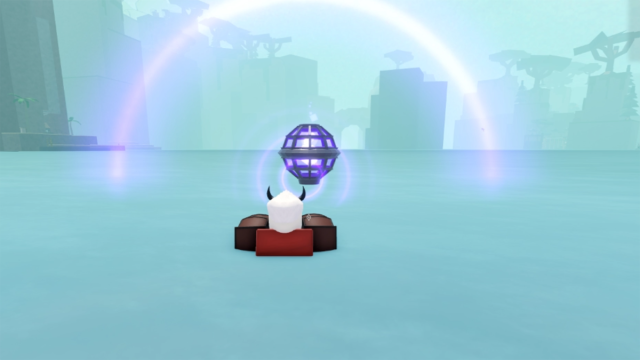
Repeat this a few times and you’ll have a lot of great gear, Notes, and upgrade materials early. Not to mention XP to increase with your training items. I highly recommend leaving your Notes and spare gear at the Bank before heading out again since you can lose them if you die.
User Interface Guide in Deepwoken – What Do All The Bars Mean?
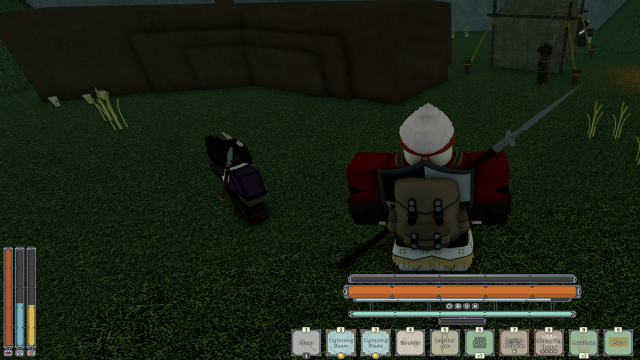
Here’s what all the bars and icons on your HUD mean:
- Health Bar: The largest orange bar is your HP, which will turn rusty after one life and blue while in the Depths.
- Poise Bar: Above the HP bar is Poise, which is your block meter. If this fills up while blocking, your guard will break, and you’ll be exposed.
- Armor Bar: Beneath HP is a thin gray bar signifying your armor. Once this runs out, your armor will break, so I recommend going to the Smith and repairing it once it’s about 40% to 50% down. Just talk to the Smith, click on your armor on the left, and click Repair at the bottom.
- Natural Armor: If you’re a Vesperian or have natural armor, a thin green bar will show up beneath your armor bar with a similar purpose.
- Cooldown Icons: Beneath your armor are icons signifying when your Roll, Feint, Parry, etc., are on cooldown.
- Ether: The long pale green bar at the bottom is your Ether or Mana for using your Mantra (Spell) abilities.
- Tempo: The short blue bar at the bottom beneath Ether is your Tempo bar, which increases Ether regeneration during combat and allows you to Vent once you fill up half.
- Blood, Thirst, and Hunger: In the bottom left is your Blood bar on the far left, which is used to regenerate health at a campfire. It’s followed by Thirst, which is filled with water, and Hunger, which is filled with food. Thirst blurs your screen when low and isn’t lethal, but Hunger can heavily debuff you in various ways, so keep this high. On the other hand, running out of Blood is lethal.
- Notes & Knowledge: In the lower right are your currency and knowledge points are to be used at Shrines to reroll stats.
What Happens When You Die and How to Revive in Deepwoken
Each of your characters gets three lives in Deepwoken. The first time you die, you’ll respawn back at the inn, and your HP bar will turn rusty. You’ll also lose some gear and all your Notes. At this point, you can earn back an extra life just by increasing your Power to the next level. However, if you die while your HP bar is rusty, you’ll lose your second life and be transported to The Depths.
This is a special and highly dangerous area where you can either fully revive your character or lose them permanently. I highly recommend you check out our full Death & Revive guide for more details. It’ll guide you through The Depths as you:
- Travel safely to the city at the center of the map.
- Ring the two bell towers there.
- Head into the center of the city through the gate, which opens after the two bells are rung.
- Fight a copy of yourself and beat it, causing you to fully revive with all lives.
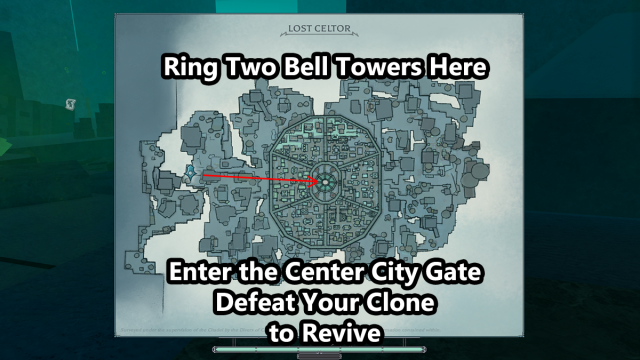
Note that if you die in the Depths, you’ll be transported to the Fragment of Self area, which is the permadeath area. Your last chance here is to interact with the Shrine in front of a copy of yourself. This Shrine can fully revive you once if you pay a Robux fee. Note that you must be at least Power 1 for this feature.
That’s it for my ultimate Deepwoken beginner’s guide. As you can see, it’s all about learning how stats, Talents, combat, and leveling work as well as where to grind. You’ll learn the combat system over time just by playing. Stay tuned to Destructoid for more DW guides, like our full race abilities list.






+ There are no comments
Add yours